Plan the next area
Choose the objective, lane or jungle quadrant that matters. Ward for the next play, not the last one.

See the play before it reaches you
Push first, enter together, clear safely and leave a line of information across the routes that matter next.
The control loop
A ward placed without lane pressure, cover or an exit can cost more than the information it provides.
Choose the objective, lane or jungle quadrant that matters. Ward for the next play, not the last one.
Push a nearby wave and enter with a teammate. Missing enemies turn a routine ward into a face-check.
Sweep likely wards without standing still in a route the opposing team can collapse through.
Layer entrances, ping the information and leave by the route you planned. Do not linger for one more ward.
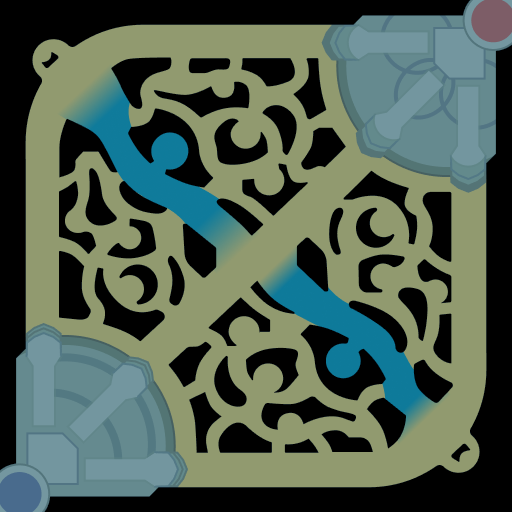
Interactive Summoner's Rift map
Choose the play you are preparing. The numbered markers show an order for establishing information, not mandatory ward spots.
 Your base
Opposing base
Your base
Opposing base
Choose the right information tool
Exact cooldowns and interactions can change. The current item tooltip remains authoritative.

Use the yellow trinket to cover a route that matters before you leave it. A ward behind the play is less useful than one watching the next entrance.
Lane safety, river entrances and the next objective approach.
Sweep while moving through an area your team can actually defend. Finding a ward is not permission to stand still and clear it while enemies collapse.
Objective setup, roams, ganks and checking a retreat path.
Place it where your team can protect it or where immediate denial changes the next play. Replacing an exposed Control Ward repeatedly only feeds gold away.
Pit control, defended brushes and a stable defensive entrance.
Use long-range vision when walking into the area would be the dangerous part. It is particularly useful for fragile champions who cannot safely cross fog first.
Remote checks, deep routes and late-game objective approaches.
A completed Support quest supplies several wards, but that does not make vision a one-player job. Teammates still need trinkets, lane pressure and safe escorts.
Layering entrances instead of placing every ward in one brush.New for the 2026 Rift
Place a ward on a glowing Faelight ring and it becomes a superward: its normal vision radius increases and the map feature reveals an additional shaped region for a limited time.
Deep warding
Deep vision reveals movement earlier, but placing it is the dangerous part. Pass these checks before entering.
At least one nearby allied wave is making opponents answer the map instead of freely collapsing on you.
The champions who can catch you are visible, dead, recalling or clearly committed elsewhere.
A teammate is close enough to contest the route or help you leave. One person should not enter first and alone.
You know which path, wall, plant or allied structure gets you home after the ward is placed.
Objective setup
These are planning windows, not fixed Riot rules. Adjust for recalls, lane state, Teleports and the live objective timer.
Recall for items and wards, then move the nearest waves so opponents must choose between farm and the setup.
Support and Jungle establish the first line while nearby laners cover entrances and preserve escape routes.
Clear the routes opponents need, refresh useful wards and avoid stacking every ward inside the pit.
Hold the safer entrances, ping visible movement and stop walking into new fog merely to chase one ward.
Match state
Do not use the same ward spots when ahead, even and behind.
Ward the exits opponents must use to reach the next wave or objective. Keep the line connected to allies; do not turn a lead into five separate jungle invades.
Prioritise entrances and crossroads that reveal who moves first. Push a wave before converting river vision into deeper information.
Ward from allied structures outward, use long-range checks and wait for visible opponents before reclaiming deeper areas with teammates.
Shared responsibility
Support carries more wards. The whole team creates the conditions that make those wards safe and useful.
Carry the largest ward supply, establish the first safe line and ask for an escort. Do not become the team's disposable face-check.
Track which side matters next, sweep likely approach routes and move with Support before a neutral objective.
Push or stabilise the centre wave, then help connect both river entrances. Mid priority makes deep vision safer.
Ward the lane flank and river route, then move after the wave. Damage dealers still contribute trinket vision.
Cover the side-lane flank, use vision to extend safely and move before a top-side objective when the wave allows it.
Common losses of information
Ask for cover before crossing fog.
The ward expires before the play matters.
Several wards reveal the same route and leave others dark.
One visible ward can bait you into an unsafe pause.
Information is wasted when teammates never notice it.
Choose a ward for the next play
A useful ward answers a question before the answer becomes urgent. These examples assume Summoner's Rift; change the route for your side, lane state, visible enemies and available teammates.
Cover the route between the enemy jungle and your lane before extending. Prefer information that gives time to leave, rather than a ward directly beside you that reveals the threat too late.
If several enemies vanish, shorten the push even if one route is warded.Start with reachable lane flanks and approaches from your own side. Do not walk to a standard river spot while opponents control the wave and can follow you. Ask for cover before rebuilding the river line.
A safer defensive ward can be better than dying for a deeper one.Use an available long-range vision tool or follow a teammate who can safely cover the entrance. Keep a route back to allies. Range lets you contribute without becoming the first body into an unseen engage.
Damage hitting a brush does not guarantee the brush or the route beyond it is clear.Layer pit information with approach and flank coverage. Sweep the route your team plans to use and keep someone able to defend it. A single pit ward cannot cover every way an opponent can arrive.
If you cannot enter first, check from safety and decide whether to contest, trade elsewhere or retreat.Advance one connected line with lane pressure and an escort. A crossroads can reveal movement toward multiple destinations. Keep an exit and stop when the opponents who can catch you disappear.
Deep wards are valuable because of earlier information, not because depth itself earns a good play.Move your vision plan toward the next wave, objective or threatened structure. Refill available ward supplies on a safe reset and check trinket charges before the next setup.
Do not keep defending an irrelevant ward after the team has left the area.Communicate the warding planChoose the next objectiveCoordinate with community teammates
Get value from each charge
Use the ward map as a planning aid, then check whether the live position is safe. A marked spot is a suggestion, not permission to enter enemy-controlled fog.
Choose an entrance that reveals the movement you care about. Spread coverage across different approaches instead of stacking wards that all answer the same question. Consider whether the ward will remain useful during the next play.
Use it in an area your team can hold or contest. If opponents can remove it safely while your allies are elsewhere, the denial may be short-lived. Do not turn defending the ward into an unwanted fight.
Clearing vision takes time and makes your position predictable. Cover each other and check nearby enemies before stopping to attack a ward. Finding a ward does not require you to finish clearing it.
Riot's 26.1 rules say placing a new allied ward on an occupied Faelight destroys the old one. Its temporary bonus region is the same shape regardless of ward type; a Control Ward does not enhance that region.
Check whether the existing ward already covers the play before spending another charge.Riot's Faelight and vision rules
It is one indicator, not a full account of decisions. Ask whether the information prevented a collapse, enabled a rotation or protected an objective approach. Do not take an unsafe route solely to increase a number.
Use charges for information the team needs. Keep the next play and your refill opportunity in mind. Emptying all charges into overlapping or irrelevant locations can leave you without coverage when the map changes.
Treat champion traps as additional information and threat, rather than a complete replacement for trinkets and shared vision. Their placement, availability and interactions differ from wards. Cover the approach your team needs even when traps are elsewhere.
Consider when and where you are placing them. A predictable ward without nearby allies may be easy to remove. Change the timing or defend a safer line; do not repeatedly enter the same dangerous route just to replace it.
Quick answers
A deep ward is placed beyond the nearest safe river line, usually in an opposing jungle route or behind an objective approach. Its value is earlier information; its cost is the danger required to place it.
No. Support usually carries the most wards, but every role contributes trinkets, lane pressure, sweeping, escorting and pings. Vision control fails when one player is sent into fog alone.
Sweep when your team is about to use or defend the area. Sweeping too early can expire before the play, while sweeping alone can expose you to the collapse you were trying to prevent.
No. Treat it as local vision denial and a visible ward your team may need to defend. Read the current in-game tooltip for patch-specific interactions.
Faelights can temporarily extend the value of a ward placed on their ring. Their bonus region is temporary, and the ward can still be detected or removed.
 Baron
Baron Dragon